By Shaheer Malik · · 7 min read
How to Make a Product Demo Video Without a Video Editor
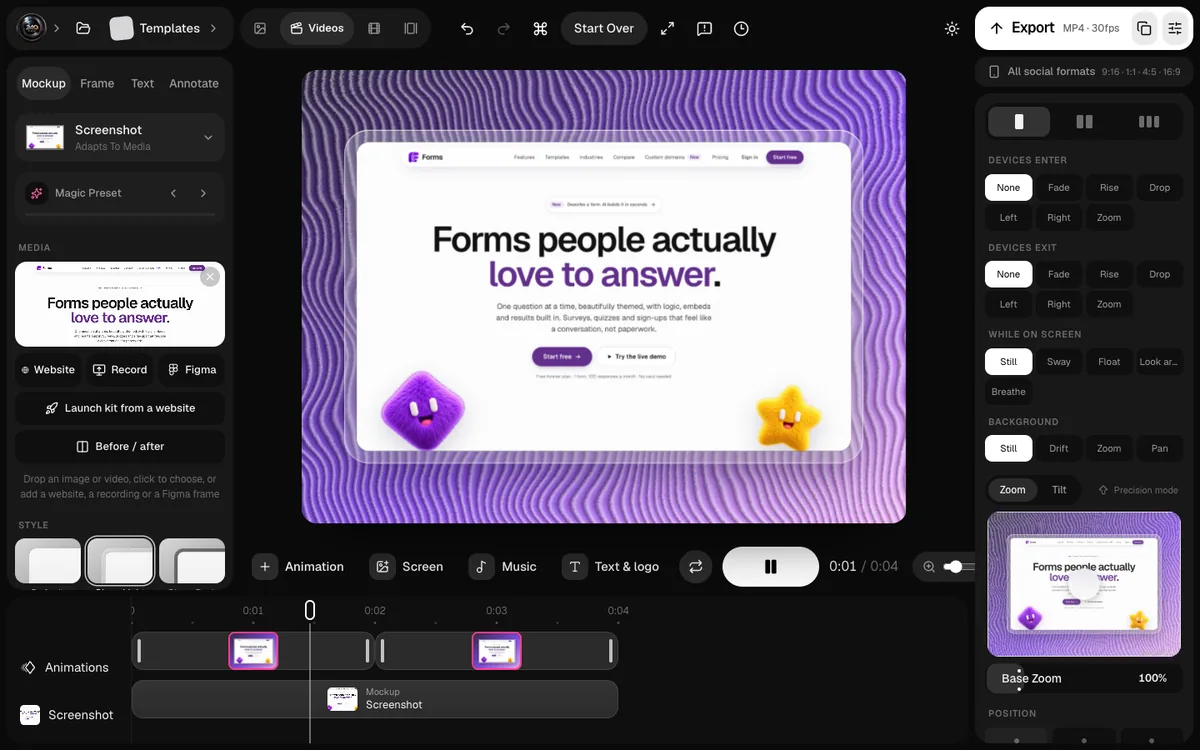
You can make a polished product demo without a video editor by building it from parts instead of recording and cutting: capture clean screens or short screen recordings, place them in a device mockup, add camera moves on a timeline to guide attention, show interactions with an animated cursor and callouts, add a headline and music, and export an MP4. Keep it 20 to 60 seconds, lead with the product's main outcome, and cover one story, not every feature.
For a lot of founders, "we should make a demo video" is followed by a sinking feeling.
It sounds like a project: learn a video editor, record the screen twenty times until the cursor behaves, figure out keyframes, export, find a typo, export again. So it gets pushed to "after launch", then quietly forgotten.
Here's the thing: most product demos don't need a video editor at all. They need clean screens, a clear story and a few well-placed movements, and you can build all of that from parts instead of recording and cutting.
In this guide, I'll walk through a workflow for making a polished demo without traditional video software: planning the story, capturing screens, building the video on a timeline, and getting the details right.
Why Recording-and-Editing Is Hard
The traditional approach is to record your screen while using the product, then fix it in an editor. It's hard because:
- Every take is a performance. One stray click, a slow page load or a notification means doing it again.
- The cursor wanders. Real mouse movement is jittery and hesitant.
- Small UI is unreadable. A full-screen recording shrunk into a video shows tiny text.
- Editing is a separate skill. Cutting, zooming and timing in a professional editor takes practice.
Building from parts removes most of these problems. There's no performance to get right, the cursor goes exactly where you put it, and zooms are placed deliberately rather than cropped after the fact.
Step 1: Plan One Story
Decide the single outcome your demo shows. Not "here's our product", but "here's how you turn a customer call into a follow-up email in 30 seconds."
Then outline three to five beats:
- The starting point: the problem or input.
- The key action: the one or two steps that matter.
- The result: the outcome, held on screen.
- (Optional) A second proof point: one related feature.
- The close: your name and a next step.
| Beat | Duration | What's on screen |
|---|---|---|
| Start | 3 to 5 s | The input or problem |
| Action | 10 to 20 s | The key steps, with cursor and zooms |
| Result | 5 to 8 s | The outcome, held |
| Close | 3 s | Name, headline, next step |
Step 2: Capture Clean Screens
Your screens are the raw material, and they matter more than any effect.
- Use realistic data. Names, numbers and content that look like a real customer's.
- Clean the chrome. Hide browser extensions and bookmarks; set a tidy status bar on mobile.
- Capture each state. Take a screenshot at every beat: before, during, after. For interactions that need motion, record short clips of a few seconds each.
- Capture at the right size. Match the device you'll show; for websites, capture at the device's real viewport.
Step 3: Put It in a Device
Place your screens in a device mockup: a browser window or laptop for web products, a phone for mobile apps. The frame makes the demo look like a product rather than a screen recording, and it gives zooms something to move within.
In 240fps, add your screens in order and each one transitions into the device on the timeline, with a slide, fade, scroll or zoom.
Step 4: Guide Attention with Camera Moves
This is where demos go from "a slideshow" to "a video". Use the camera to show viewers where to look:
- Push in on the part of the screen where the action happens.
- Pan from one detail to the next.
- Pull back to show the result in context.
Keep moves purposeful. Every zoom should land on something that matters; camera motion that doesn't point anywhere just makes people dizzy. Zoom animation lets you click the spot to zoom into and adds the move at the playhead.
Step 5: Show the Interaction with a Cursor
A cursor makes a demo feel like someone is actually using the product. Instead of recording your own mouse, place cursor points on the screen in order and let it glide between them, clicking where it should.
- Place points at the buttons and fields that matter.
- Mark clicks, so they show a press and a ripple.
- Let the camera zoom in on each click to make small UI readable.
An animated cursor placed like this is smoother than any recording, and you never need a retake.
Step 6: Add Callouts and Text
- A headline at the start: the outcome in one line.
- Short labels for each beat, since many people watch without sound.
- Highlight boxes or arrows on the thing that changed.
- Blur anything private.
Keep text on screen long enough to read (about a second per three or four words) and never cover the action.
Step 7: Music and Pacing
A light music track makes a demo feel finished, even though many viewers will watch muted. Choose something with a steady beat and let it fade out at the end.
Watch the full video once, start to finish, as a viewer would. Anything that feels slow, cut or shorten. Anything that goes by too fast to read, lengthen.
Step 8: Export for Each Channel
- Website and docs: 16:9 MP4 or WebM, 20 to 60 seconds.
- Social: 9:16 or 1:1 versions, 15 to 30 seconds.
- Email and link previews: a still frame that links to the video.
Save the project so you can update the demo when the product changes, instead of starting over.
When You Do Need a Video Editor
Building from parts covers most product demos. A traditional editor still makes sense for:
- Long tutorials with voiceover and chapters.
- Footage of people, not just screens.
- Complex compositing and motion graphics.
For launch videos, feature demos, store previews and social clips, you likely don't need one.
Three Demo Structures to Copy
Most product demos fit one of three structures. Pick the one that matches your product.
1. The transformation
Best for tools that turn an input into an output: editors, converters, AI features, analytics.
- Open on the messy input: a raw file, a spreadsheet, a long email thread.
- Act: one or two clicks, shown with the cursor and a zoom.
- Close on the clean output, held for a few seconds, with a headline naming the benefit.
2. The workflow
Best for products that replace several steps with fewer: project management, scheduling, CRMs.
- Open on the goal: "Book a client meeting."
- Act: the three or four steps, each with a short label, the camera following the cursor.
- Close on the finished state: the booked meeting, the confirmation sent.
3. The tour of three
Best for platforms with several core features, when you can't pick just one.
- Open on the main dashboard, pulled back.
- Act: the camera visits three features in turn, zooming into each with a one-line label.
- Close by pulling back to the whole dashboard, with the product name.
Whichever structure you choose, keep one outcome at the centre, even in a tour.
Keeping Demos Up to Date
A demo made from parts is easy to maintain. When the interface changes, replace the affected screenshots in the saved project and re-export; the camera moves, cursor points and text stay where they are. Recorded demos, by contrast, usually have to be re-recorded from the start.
FAQs
How long should a product demo video be?
20 to 60 seconds for most marketing demos. Show one story clearly; save deeper walkthroughs for dedicated tutorials.
Do I need to record my screen?
Not necessarily. A sequence of clean screenshots with transitions, camera moves and a placed cursor often looks cleaner than a recording, and it's easier to update.
How do I make small UI readable in a video?
Zoom in on the part of the screen where the action happens, and use short on-screen labels. A full screen shown at video size is almost always too small.
Should a demo video have voiceover?
It can, but it should also work without sound, because many people watch muted. Put the key message in on-screen text first.
Conclusion
A great product demo isn't a feat of editing. It's a clear story, told with clean screens and a few deliberate movements that show people exactly where to look.
Build it from parts and you get a demo that's polished, easy to update, and never needs a retake because the cursor wandered.
What's the one outcome your demo should show?